其实这个板子很早就发布了,不过我是最近才接触这个板子,原因也非常多吧,但是既然支持联网了,而且目前性能也都不错,能做的事情肯定不少的.
要想使用Home Assistant,最简单的方法就是使用容器部署,不管你正在用的是什么系统,反正装了容器就是方便,差不多就是无脑打命令,什么,系统都不会装,只能打包整个系统?
我这里用的是一个VPS,想必很多人都有各种各样的Linux系统的服务器或者派,甚至Windows都能装,甚至其实可以装在NAS上?
安装Docker.
 curl -fsSL https://test.docker.com -o test-docker.sh
 sudo sh test-docker.sh
容器安装完成.
安装Home Assistant.
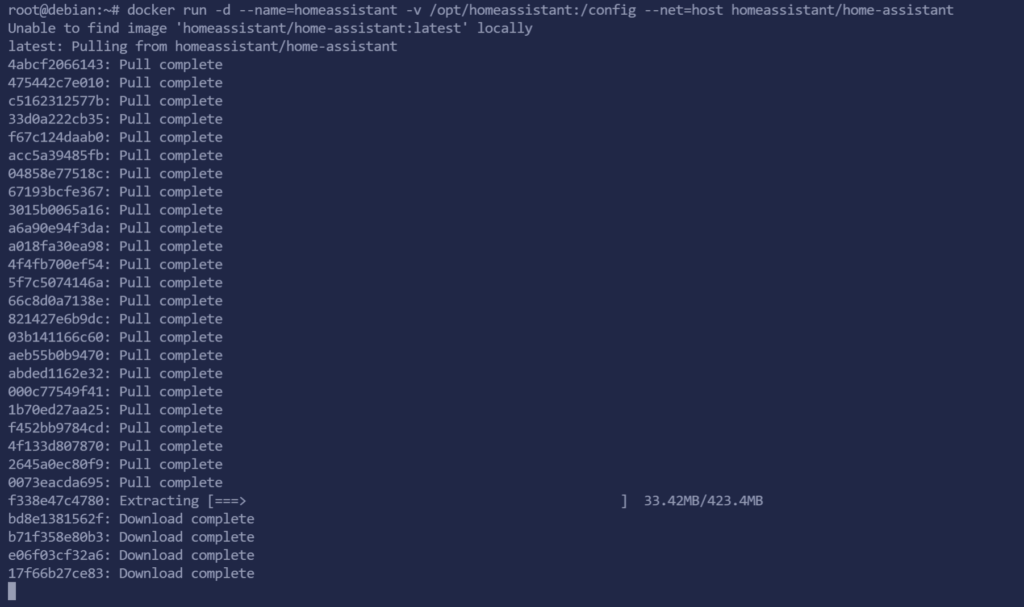
docker run -d --name=homeassistant -v /opt/homeassistant:/config --net=host homeassistant/home-assistant还真组件比较多.
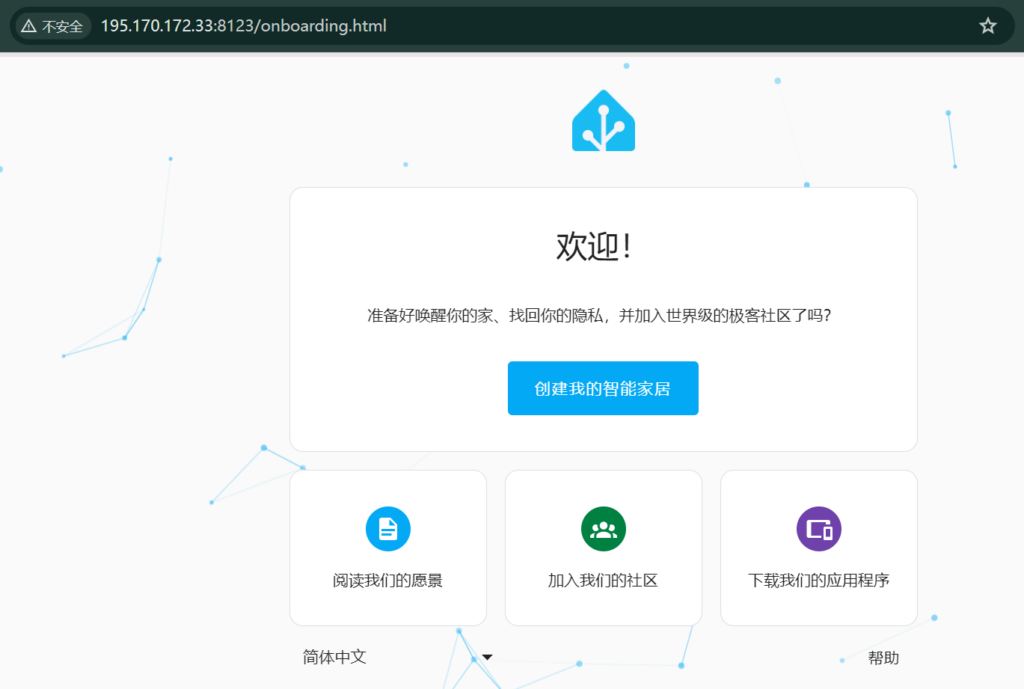
先通过网页进入Home Assistant配置个默认用户密码,默认的Web访问端口是8123,进去后点创建我的智能家居.
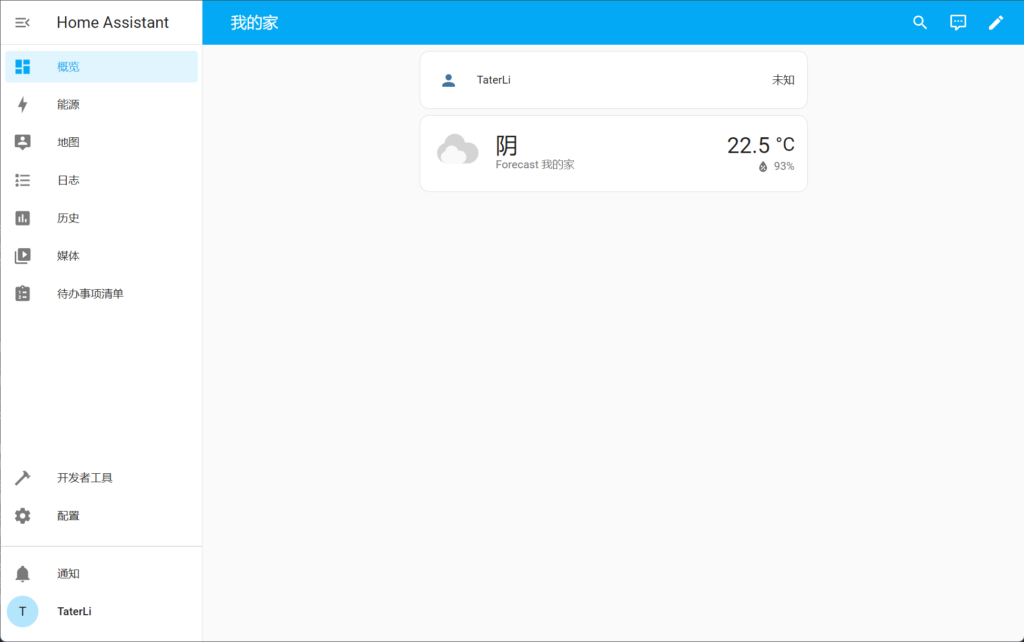
接下来就是填一个新的超级管理员账号密码等等,可不能忘记了.之后就进入首页,这里就暂告一段落.
接下来安装MQTT服务,需要先创建对应目录.
mkdir -p /opt/mosquitto/config
mkdir -p /opt/mosquitto/data
mkdir -p /opt/mosquitto/log编写一个默认配置文件,我这里存在/opt/mosquitto/config/mosquitto.conf
listener 1883 0.0.0.0
persistence true
persistence_location /mosquitto/data/
log_dest file /mosquitto/log/mosquitto.log
# password_file /mosquitto/config/password
per_listener_settings false
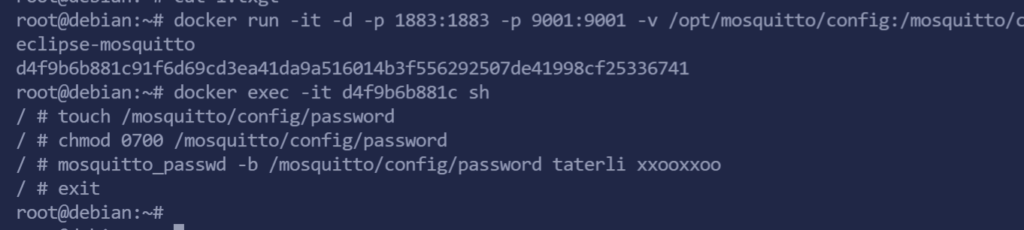
allow_anonymous false安装MQTT服务器,运行后记得返回的ID,等下还要进去操作.
docker run -it -d -p 1883:1883 -p 9001:9001 -v /opt/mosquitto/config:/mosquitto/config -v /opt/mosquitto/data:/mosquitto/data -v /opt/mosquitto/log:/mosquitto/log eclipse-mosquitto进入容器,ID替换成刚才生成的ID.
docker exec -it d4f9b6b881c sh容器内生成密码.
touch /mosquitto/config/password
chmod 0700 /mosquitto/config/password
mosquitto_passwd -b /mosquitto/config/password taterli xxooxxoo
exit
操作过程参考.
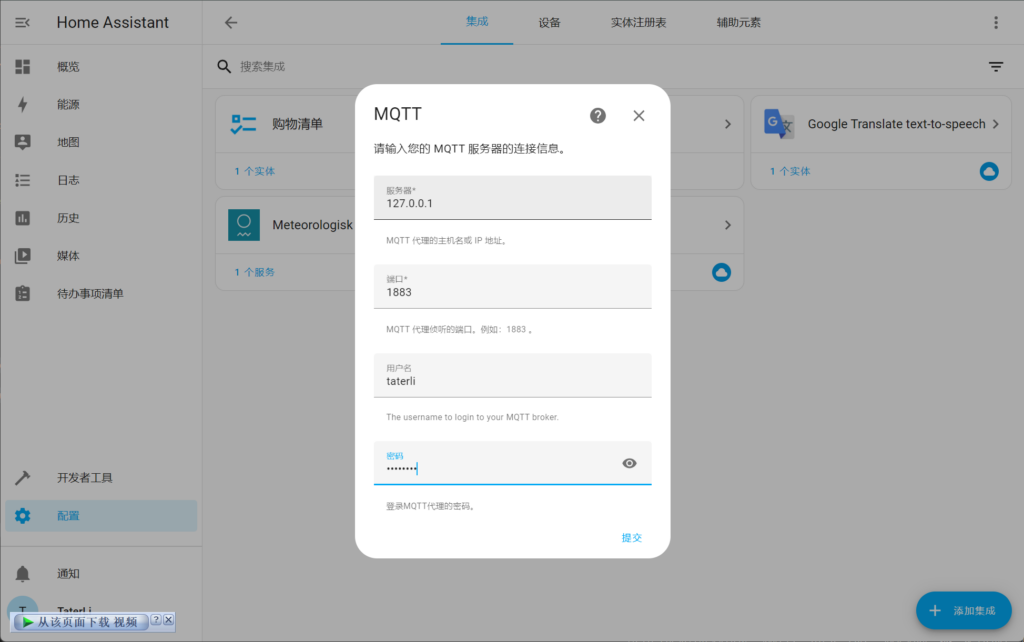
重新修改前面的mosquitto.conf文件,让他支持密码,然后重启容器,接着回到/opt/homeassistant/configuration.yaml配置文件,新增一个MQTT的配置,方便我进行下一步.
mqtt:
  switch:
      - name: "Bedroom Switch"
        command_topic: "home/bedroom/switch1/set"
        availability:
          - topic: "home/bedroom/switch1/available"
        payload_on: "ON"
        payload_off: "OFF"
        qos: 0
        retain: true
  sensor:
    - name: "Temperature Input 1"
      state_topic: "uno/temp_in1"
      unit_of_measurement: "°C"
      value_template: "{{ value }}"
在网页上重载配置文件就可以了.

在配置中添加一个MQTT服务器集成.
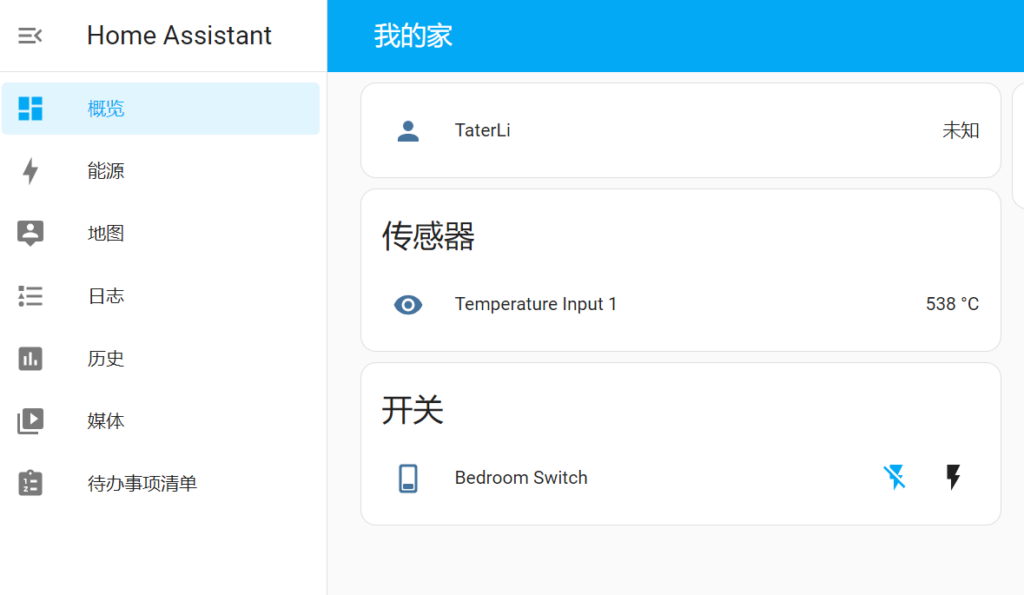
首页就能看到我定义的传感器和开关了,这里简单一点,先不讨论HAC做更多的配置,就这么先调通.

Arduino上程序我就随便改例程的.(需要安装MQTT库)
#include <ArduinoMqttClient.h>
#include <WiFiS3.h>

#include "arduino_secrets.h"

///////please enter your sensitive data in the Secret tab/arduino_secrets.h
char ssid[] = SECRET_SSID;  // your network SSID (name)
char pass[] = SECRET_PASS;  // your network password (use for WPA, or use as key for WEP)

// To connect with SSL/TLS:
// 1) Change WiFiClient to WiFiSSLClient.
// 2) Change port value from 1883 to 8883.
// 3) Change broker value to a server with a known SSL/TLS root certificate
//    flashed in the WiFi module.

WiFiClient wifiClient;
MqttClient mqttClient(wifiClient);

const char broker[] = "195.170.172.33";
int port = 1883;

int delay_cnt = 0;
int sensorValue = 0;

void setup() {
  //Initialize serial and wait for port to open:
  Serial.begin(9600);
  while (!Serial) {
    ;  // wait for serial port to connect. Needed for native USB port only
  }

  // attempt to connect to WiFi network:
  Serial.print("Attempting to connect to WPA SSID: ");
  Serial.println(ssid);
  while (WiFi.begin(ssid, pass) != WL_CONNECTED) {
    // failed, retry
    Serial.print(".");
    delay(5000);
  }

  Serial.println("You're connected to the network");
  Serial.println();

  // You can provide a unique client ID, if not set the library uses Arduino-millis()
  // Each client must have a unique client ID
  mqttClient.setId("clientId");

  // You can provide a username and password for authentication
  mqttClient.setUsernamePassword("taterli", "xxooxxoo");

  Serial.print("Attempting to connect to the MQTT broker: ");
  Serial.println(broker);

  if (!mqttClient.connect(broker, port)) {
    Serial.print("MQTT connection failed! Error code = ");
    Serial.println(mqttClient.connectError());

    while (1)
      ;
  }

  Serial.println("You're connected to the MQTT broker!");
  Serial.println();

  Serial.println("Sending available to topic!");

  // send message, the Print interface can be used to set the message contents
  mqttClient.beginMessage("home/bedroom/switch1/available");
  mqttClient.print("online");
  mqttClient.endMessage();

  Serial.println();

  mqttClient.onMessage(onMqttMessage);
  mqttClient.subscribe("home/bedroom/switch1/set");
}

void onMqttMessage(int messageSize) {
  char command[3];
  int i = 0;
  if (mqttClient.messageTopic().equals("home/bedroom/switch1/set")) {
    while (mqttClient.available()) {
      command[i++] = (char)mqttClient.read();
    }
    if (command[0] == 'O' && command[1] == 'N') {
      Serial.println("on led");
    } else if (command[0] == 'O' && command[1] == 'F' && command[2] == 'F') {
      Serial.println("off led");
    }
  };
}

void loop() {
  // call poll() regularly to allow the library to send MQTT keep alives which
  // avoids being disconnected by the broker
  mqttClient.poll();
  delay(1);
  delay_cnt++;
  if(delay_cnt == 1000){
    delay_cnt = 0;
    sensorValue = analogRead(A0);
    mqttClient.beginMessage("uno/temp_in1");
    mqttClient.print(sensorValue);
    mqttClient.endMessage();

    Serial.print("Sending A0 value to topic: ");
    Serial.println(sensorValue);
  }
}
现在UNO R4程序都辣么大了吗,居然用了64K左右.
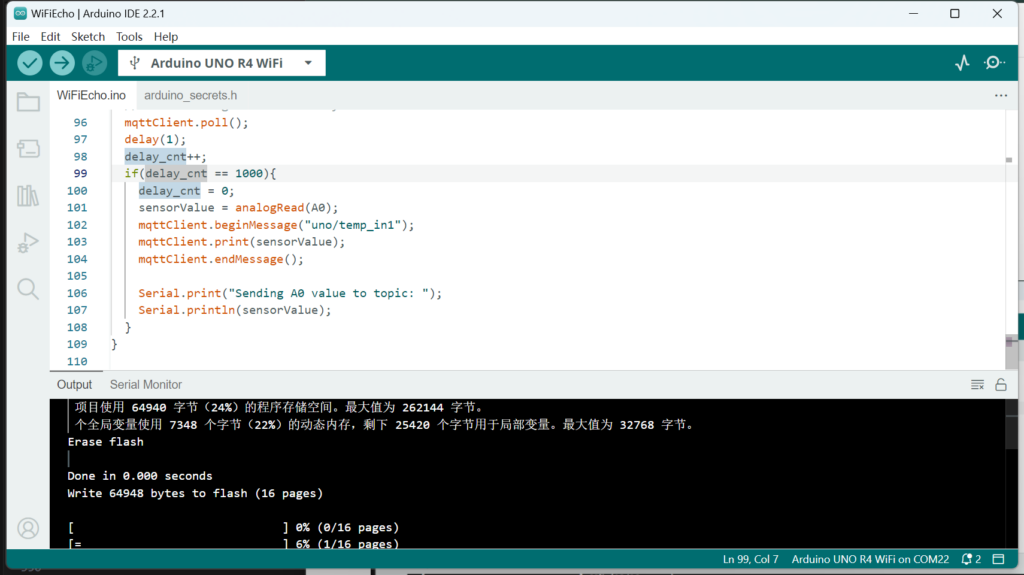
因为我是读取A0数值直接当温度上传了,所以数值有点夸张.
安装HAC可以用很多漂亮组件,这些网上教程太多了,我就不多说了.