在Linux中如何调试,很多人都知道,但是Windows中就不一定了,我拿OpenOCD这个开源项目来举例.
项目地址:https://github.com/openocd-org/openocd
首先下载MSYS2,一路Next就可以了.
安装后得到以下几个不同的套件.
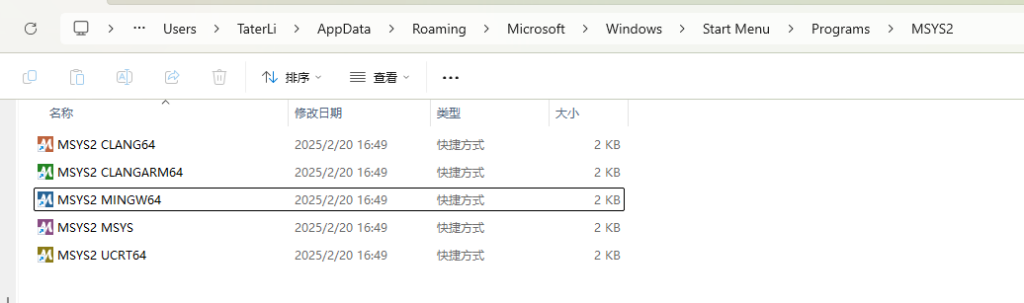
简单说明一下.
- CLANG64:使用Clang编译器,针对64位Windows系统.
- CLANGARM64:使用Clang编译器,针对64位ARM架构.
- MINGW64:使用GCC编译器,针对64位Windows系统,适用于Windows本地开发.
- MSYS:类Unix环境,适合开发者使用命令行工具,处理文件等,不包括编译工具链.
- UCRT64:基于微软UCRT运行时的64位工具链,适合与Windows现代运行时兼容的开发.
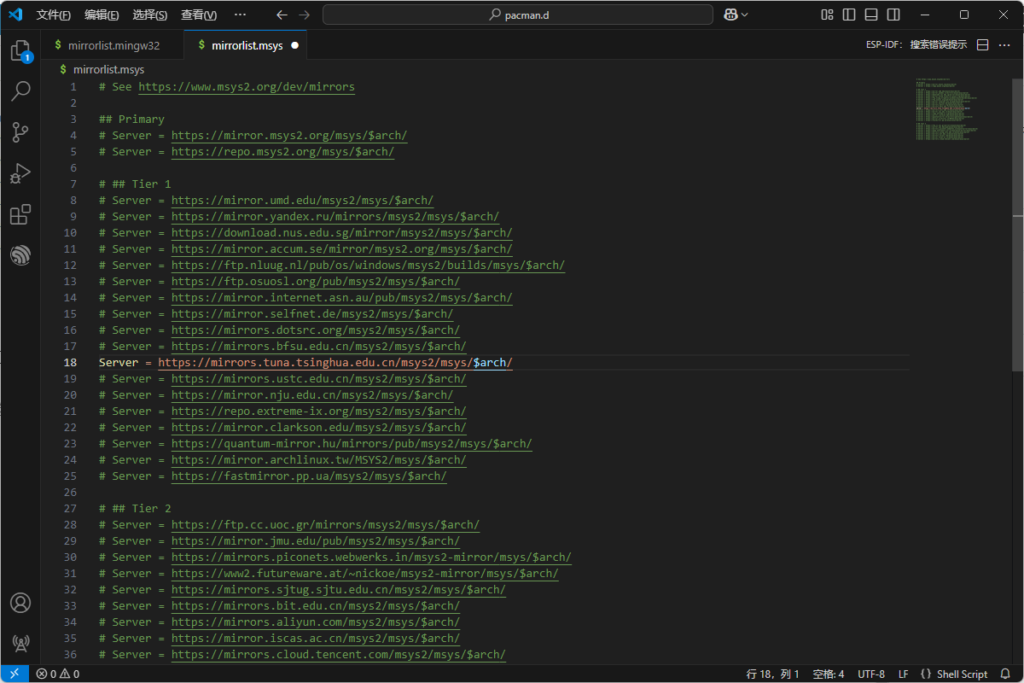
可以在这个目录里修改他们各自的Repo,毕竟在默认Repo在国外比较慢.
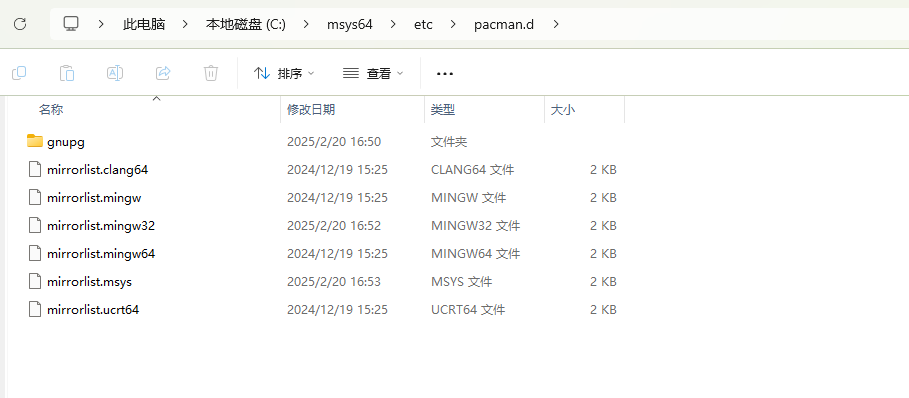
里面内置了大多数Repo,需要哪个取消注释哪个就行.
现在安装一些开发环境用的工具.
pacman -S libtool autoconf automake texinfo pkg-config make autogen git unzip bzip2 base-devel mingw-w64-x86_64-toolchain mingw-w64-x86_64-libusb mingw-w64-x86_64-libusb-compat-git mingw-w64-x86_64-hidapi mingw-w64-x86_64-libftdi mingw-w64-x86_64-arm-none-eabi-gcc mingw-w64-x86_64-capstone之后切换到F盘进行第一次构建尝试.
cd /f
git clone https://github.com/openocd-org/openocd
git submodule update --init --recursive
cd openocd/
./bootstrap
./configure --enable-internal-jimtcl
make
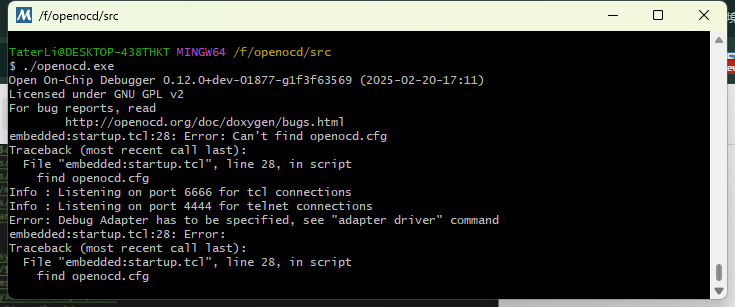
编译目标在src/openocd.exe中.
在VSC中打开,新建用于调试的launch.json
{
    "version": "0.2.0",
    "configurations": [
        {
            "name": "(Windows) Launch",
            "type": "cppdbg",
            "request": "launch",
            "program": "${workspaceFolder}/src/openocd.exe",
            "args": [],
            "stopAtEntry": false,
            "cwd": "${workspaceFolder}",
            "environment": [],
            "externalConsole": true,
            "MIMode" : "gdb",
            "miDebuggerPath": "C:/msys64/mingw64/bin/gdb.exe",
            "setupCommands": [
                {
                    "description": "Enable pretty-printing for gdb",
                    "text": "-enable-pretty-printing",
                    "ignoreFailures": true
                }
            ],
        }
    ]
}
在main函数打一个断点.

在这个时候,大概可以认为是OK了,但是通常这个编译的调试信息是很少的,所以一般还可以配置.
CFLAGS="-O0 -g3" ./configure