这个超干净系统是基于上游源,通过一些代码修改和裁切,最终做到的.去掉了显示功能但是保留GPU能力,依然可以进行ffmpeg编解码,去掉了UEFI等启动环节直接引导系统,系统就是纯Debian Trixie的minibase基础上,只安装了OpenSSH,其他一个都没装,默认WiFi各种也不加载,但是模块已经编译进去,除掉/lib/firmware少量原厂闭源组件(GPU和WiFi,BLE/BT),其他都是开源社区构建的.因为不做复杂的显示,也把cma缩小到128M,当然对于8G/16G这么大的板子,这点也微不足道.只要不是开多路GPU编码,cma是用不完的.
这个系统不需要拆分多个分区,EMMC或者NVME上只需一个分区就可以,U-Boot刷在SPI Flash,因为这个板子本身就是SPI Flash启动的.只是官方工具会刷到哪里都是,所以,除了开机引导第一轮,其他时候我们都是自己手动刷系统.我建议就是买个2230的硬盘,毕竟PCIE2.0x2性能还是秒杀EMMC的.
另外opensbi没有修改,这部分属于特权操作,基本没什么优化,缩减的,另外烧录这个系统,肯定还是要串口线帮助一下的,毕竟U-Boot又不能网络修改.
我修改过的源码
https://github.com/nickfox-taterli/muse-pi-pro-u-boot
https://github.com/nickfox-taterli/muse-pi-pro-linux-6.6
官方镜像下载 (希望官方镜像不会突然下架吧)
https://archive.spacemit.com/image/k1/version/bianbu/v3.0
我的镜像下载
吐槽一下,本来想只放谷歌网盘的,结果还有人不会下?
https://drive.google.com/file/d/1sXDJXrcrmI4v3HdC9oCr_5L-3KGMD4D0/view?usp=sharing
https://pan.baidu.com/s/18CuoiSUbp-nPpW5EMbp6mQ?pwd=itkn
注意,用了官方的工具,他会一口气把SPI Flash,EMMC,NVME一起擦写,所以,我们就是先用官方的启动,再手动安装成我们自己的.
烧录就是按照USB口旁边的FDL按钮,然后按中间的按钮复位,进入BOOTROM.我的试验环境中NVME已经安装,所以他会烧录到EMMC和NVME,并最后NVME引导,我一步一步演示,如何替换成我的无头引导,最终迂回把系统放到EMMC.
官方系统登录用户名是root 密码是bianbu
登陆后可见确实挂在nvme了.

用你想到的办法把rootfs.tar.xz搬进去,我是apt安装一个openssh-server,然后scp过去,没法想资源占用那么大的无头系统居然还没openssh-server,不过我的Headless除了SSH Server,什么都没有,他好歹有一些测试资源什么的,当然还有他自己Repo,我用Debian官方Repo (清华镜像)
清除原始EMMC上内容,大概这么操作.
root@k1:~# wipefs -a /dev/mmcblk2
/dev/mmcblk2: 2 bytes were erased at offset 0x000001fe (dos): 55 aa
/dev/mmcblk2: calling ioctl to re-read partition table: Success
root@k1:~# ls rootfs.tar.xz
rootfs.tar.xz
root@k1:~# fdisk /dev/mmcblk2

Welcome to fdisk (util-linux 2.40.2).
Changes will remain in memory only, until you decide to write them.
Be careful before using the write command.

Device does not contain a recognized partition table.
Created a new DOS (MBR) disklabel with disk identifier 0xaedd9c84.

Command (m for help): p
Disk /dev/mmcblk2: 58.28 GiB, 62579015680 bytes, 122224640 sectors
Units: sectors of 1 * 512 = 512 bytes
Sector size (logical/physical): 512 bytes / 512 bytes
I/O size (minimum/optimal): 512 bytes / 512 bytes
Disklabel type: dos
Disk identifier: 0xaedd9c84

Command (m for help): n
Partition type
   p   primary (0 primary, 0 extended, 4 free)
   e   extended (container for logical partitions)
Select (default p):

Using default response p.
Partition number (1-4, default 1):
First sector (2048-122224639, default 2048):
Last sector, +/-sectors or +/-size{K,M,G,T,P} (2048-122224639, default 122224639):

Created a new partition 1 of type 'Linux' and of size 58.3 GiB.

Command (m for help): w
The partition table has been altered.
Calling ioctl() to re-read partition table.
Syncing disks.

root@k1:~# 然后用mkfs.ext4 /dev/mmcblk2p1格式一下,然后还要安装xz-utils,用apt就可以,因为我的镜像是xz压缩的.
root@k1:~# mount /dev/mmcblk2p1 /mnt
root@k1:~# ls
rootfs.tar.xz
root@k1:~# sudo apt install xz-utils -y
[ 安装过程省略 ]
update-alternatives: 使用 /usr/bin/xz 来在自动模式中提供 /usr/bin/lzma (lzma)
root@k1:~# tar xf rootfs.tar.xz -C /mnt
但是rootfs默认是按NVME启动的,所以还要稍微改一下/mnt/etc/fstab这个文件,用你熟悉的工具,内容改成这样就行.
# <file system> <mount point> <type> <options> <dump> <pass>
/dev/mmcblk2p1  /  ext4  defaults  0  1
下一步sync,然后开始烧录我的简化版U-Boot引导,这时候接好串口线什么的.
反正也不要这个系统,我也不按正常reboot,直接按FDL+复位进烧录模式.
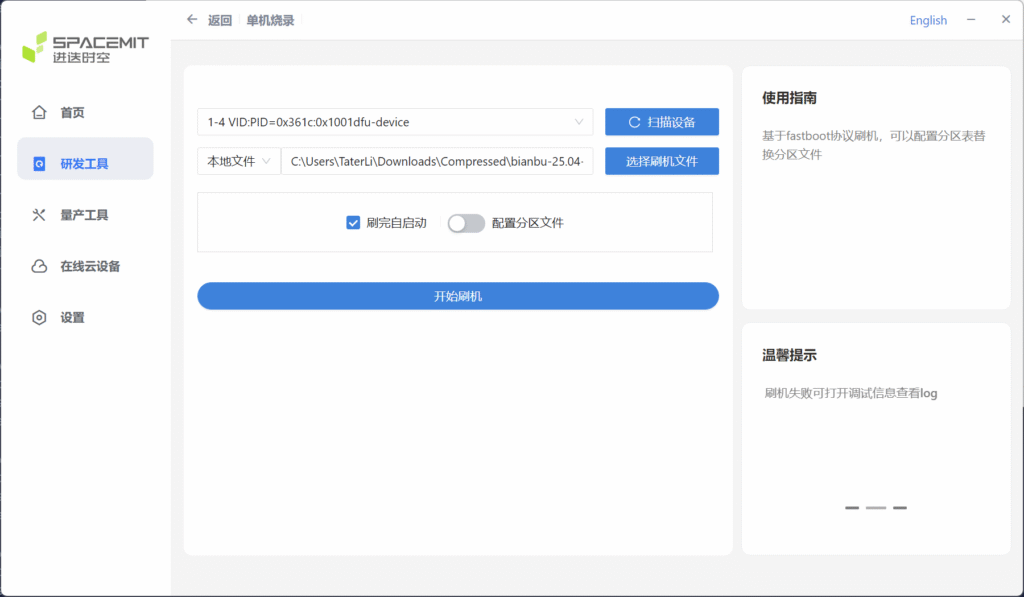
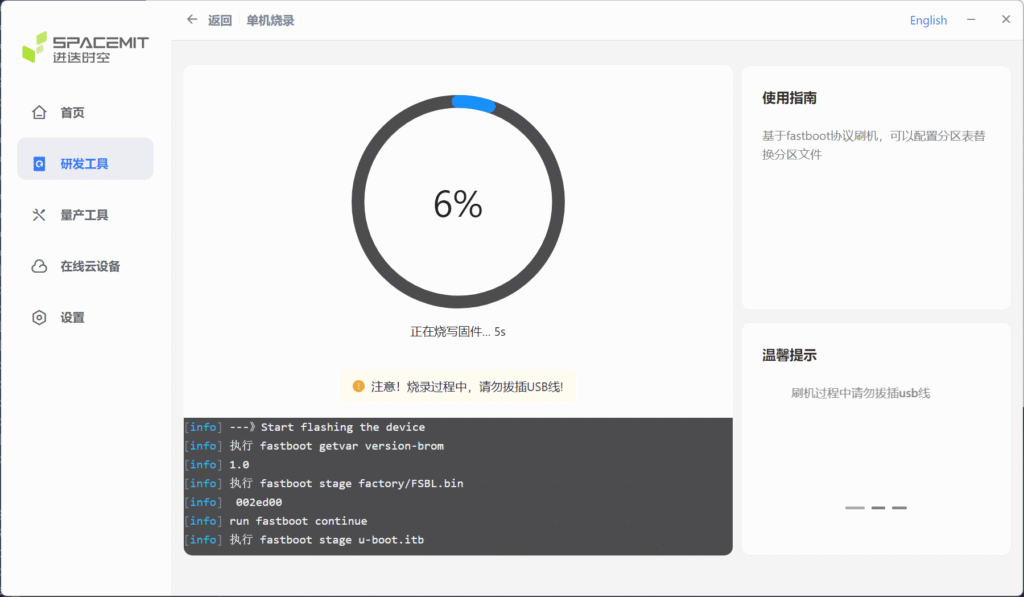
烧录工具选择我的软件包的解压目录,然后选择本地目录模式,选择分区文件是2MB这个.
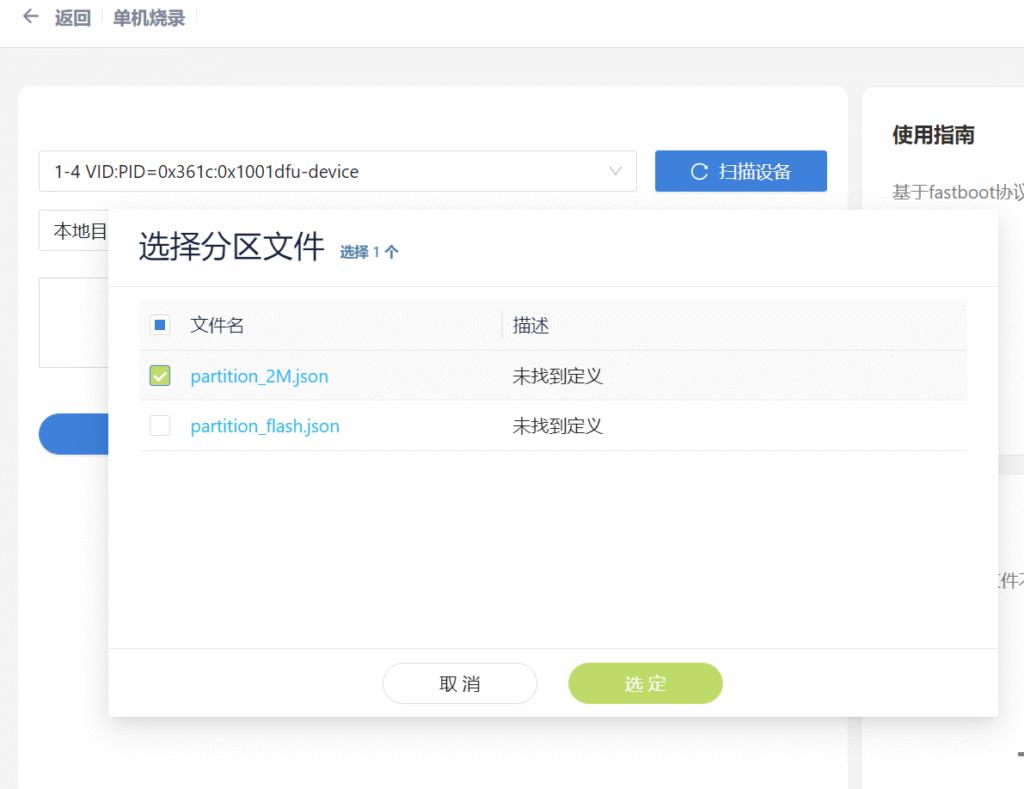
除了env其他都烧录,为什么必须这么麻烦,因为没env这个工具就报告镜像问题了.看来是硬编码的.然后U-Boot任意键可以打断.
你看到编译日期11月10号,那就是我的U-Boot了.
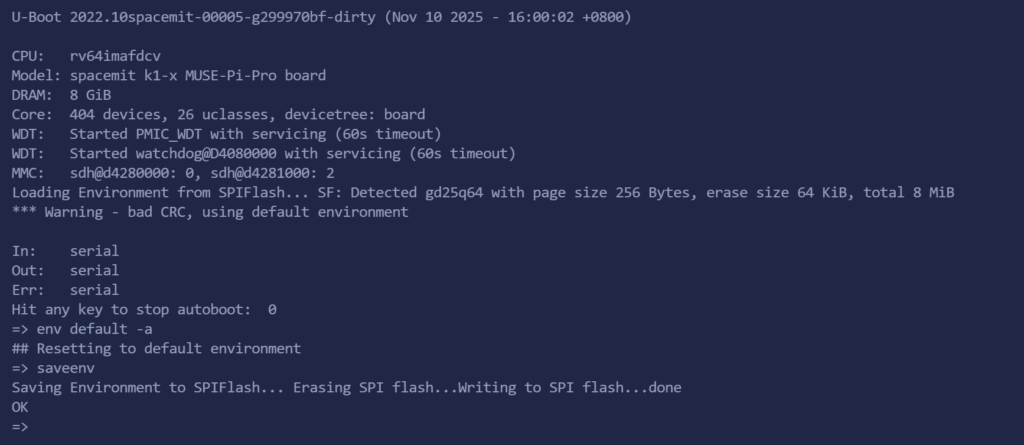
进入后执行这些命令先启动到EMMC.
env default -a
saveenv
run boot_emmc
我的系统用户名是root 默认密码 xxoo 默认没有加载无线,但是实际功能是有编译的,后期modprobe 8852bs就可以加载,不过现在主要问题是先系统安装到NVME,然后用NVME真实启动.
按照这个命令先安装软件包.
apt update && apt install xz-utils e2fsprogs fdisk接下来操作很简单了,前面做过一次了.
root@k1:~# mount /dev/nvme0n1p6 /mnt
[  163.242231] EXT4-fs (nvme0n1p6): mounted filesystem a6686274-3114-406d-b6e5-aa10afda50d6 r/w with ordered data mode. Quota mode: none.
root@k1:~# cp /mnt/root/rootfs.tar.xz .
root@k1:~# umount /mnt
[  170.400782] EXT4-fs (nvme0n1p6): unmounting filesystem a6686274-3114-406d-b6e5-aa10afda50d6.
root@k1:~# wipefs -a /dev/nvme0n1
/dev/nvme0n1: 8 bytes were erased at offset 0x00000200 (gpt): 45 46 49 20 50 41 52 54
/dev/nvme0n1: 8 bytes were erased at offset 0x1dcf855e00 (gpt): 45 46 49 20 50 41 52 54
/dev/nvme0n1: 2 bytes were erased at offset 0x000001fe (PMBR): 55 aa
/dev/nvme0n1: calling ioctl to re-read partition table: Success
root@k1:~# fdisk /dev/nvme0n1

Welcome to fdisk (util-linux 2.41).
Changes will remain in memory only, until you decide to write them.
Be careful before using the write command.

Device does not contain a recognized partition table.
Created a new DOS (MBR) disklabel with disk identifier 0xf314071f.

Command (m for help): p
Disk /dev/nvme0n1: 119.24 GiB, 128035676160 bytes, 250069680 sectors
Disk model: KBG40ZNS128G BG4A KIOXIA
Units: sectors of 1 * 512 = 512 bytes
Sector size (logical/physical): 512 bytes / 512 bytes
I/O size (minimum/optimal): 512 bytes / 512 bytes
Disklabel type: dos
Disk identifier: 0xf314071f

Command (m for help): n
Partition type
   p   primary (0 primary, 0 extended, 4 free)
   e   extended (container for logical partitions)
Select (default p):

Using default response p.
Partition number (1-4, default 1):
First sector (2048-250069679, default 2048):
Last sector, +/-sectors or +/-size{K,M,G,T,P} (2048-250069679, default 250069679):

Created a new partition 1 of type 'Linux' and of size 119.2 GiB.

Command (m for help): w
The partition table has been altered.
Calling ioctl() to re-read partition table.
[  230.850457]  nvme0n1: p1
Syncing disks.

root@k1:~# mkfs.ext4 /dev/nvme0n1p1
mke2fs 1.47.2 (1-Jan-2025)
Discarding device blocks: done
Creating filesystem with 31258454 4k blocks and 7815168 inodes
Filesystem UUID: 34b35b58-21ae-464f-b8b2-5d523a30889d
Superblock backups stored on blocks:
        32768, 98304, 163840, 229376, 294912, 819200, 884736, 1605632, 2654208,
        4096000, 7962624, 11239424, 20480000, 23887872

Allocating group tables: done
Writing inode tables: done
Creating journal (131072 blocks): done
Writing superblocks and filesystem accounting information: done

root@k1:~# mount /dev/nvme0n1p1 /mnt
[  244.261296] EXT4-fs (nvme0n1p1): mounted filesystem 34b35b58-21ae-464f-b8b2-5d523a30889d r/w with ordered data mode. Quota mode: none.
root@k1:~# ls
rootfs.tar.xz
root@k1:~# tar -xf rootfs.tar.xz -C /mnt
这时候reboot,打断U-Boot可以设置bootdelay为0加速启动,也可以跳过,默认我的精简U-Boot就是NVME启动的.
如果要设置为默认EMMC启动,前面EMMC拷贝步骤就不用了,打断U-Boot,按照这个命令设置就行.
setenv bootcmd "run boot_emmc"设置延迟为0的命令是.
setenv bootdelay 0最后记得saveenv然后reset,这样以后就记住你的选择了.
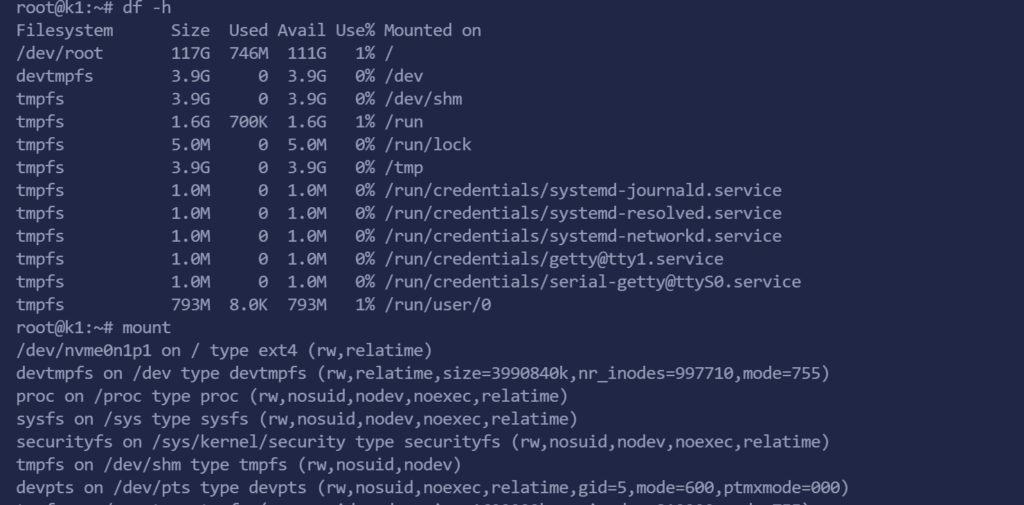
成功启动,是NVME,系统本体746M.
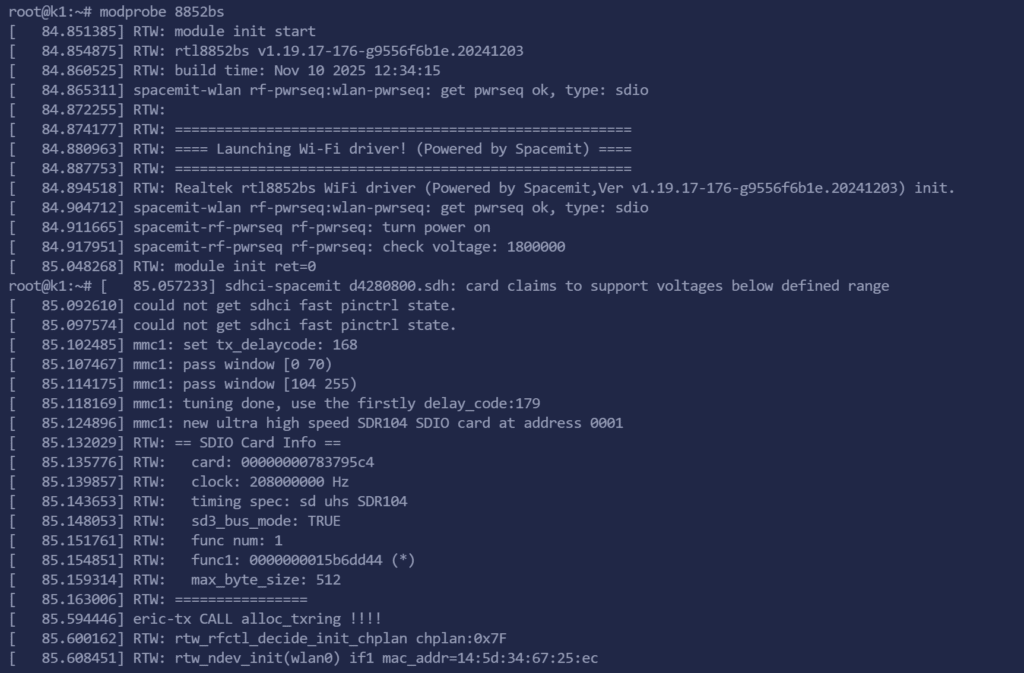
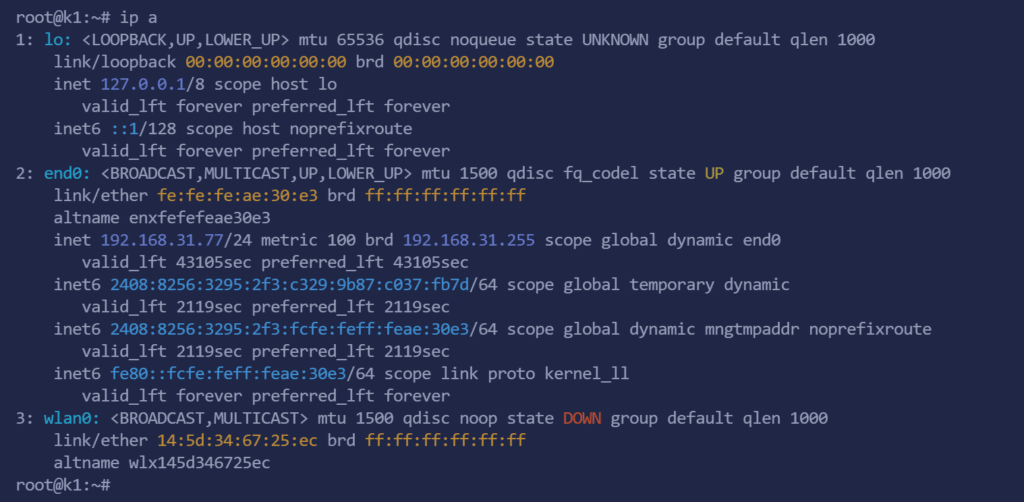
执行modprobe 8852bs就可以加载无线模块,之后使用你喜欢的无线工具进行配置就可以了.如果需要开机启动,把8852bs写到/etc/modules文件就可以,他是上电自动加载的模块文件.
关于闭源
除了GPU,RTL的闭源固件之外,这个是没办法的闭源,蓝牙脚本和esos固件都可以从 https://gitee.com/bianbu-linux 获得.esos维护的是一个小核心,里面还跑着一个RT-Thread,串口外设在40P的最后几个引脚上.至于GPU,使用V4L可以直接获得编码能力,他也没解码能力啊,都是软解码,用ffmpeg调用V4L就可以完成.
关于rproc
内核里最难抽离的就是他了,因为他以前是UEFI加载,UEFI带着ramfs,我这里没有,那么只能模块化,那么就要修改代码.有兴趣的可以看看我的提交.
<a href="https://github.com/nickfox-taterli/muse-pi-pro-linux-6.6/commit/ac50dc447ce44b3905919b5ddec81366a7920e94">https://github.com/nickfox-taterli/muse-pi-pro-linux-6.6/commit/ac50dc447ce44b3905919b5ddec81366a7920e94</a>
大佬对最新的STM32V8感兴趣吗?
@lagramoon MCU其实都一个样
大佬我也安装的v3.0 minimal,但是发现无线网卡驱动常常崩溃。您有遇到这种情况吗?
@watermeko 线firmware都是blobs的,具体这个只能看着log找有没有别人相同问题,不过我并不用无线,这些SBC无线都不能说多好