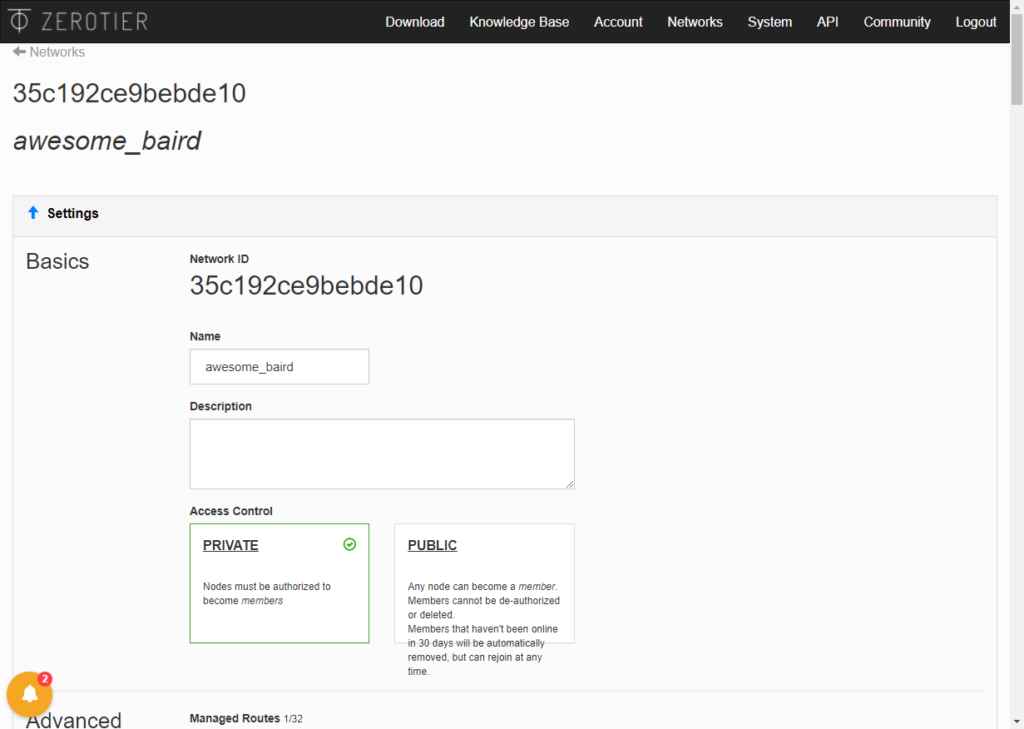
先注册一个账号然后创建一个网络,得到一个网络ID.
安装方法也很简单
apt update && apt install curl gpg sudo
curl -s https://install.zerotier.com | sudo bash
然后加入网络,记得点设备得Auth.
zerotier-cli join 35c192ce9bebde10
zerotier-cli set 35c192ce9bebde10 allowGlobal=true
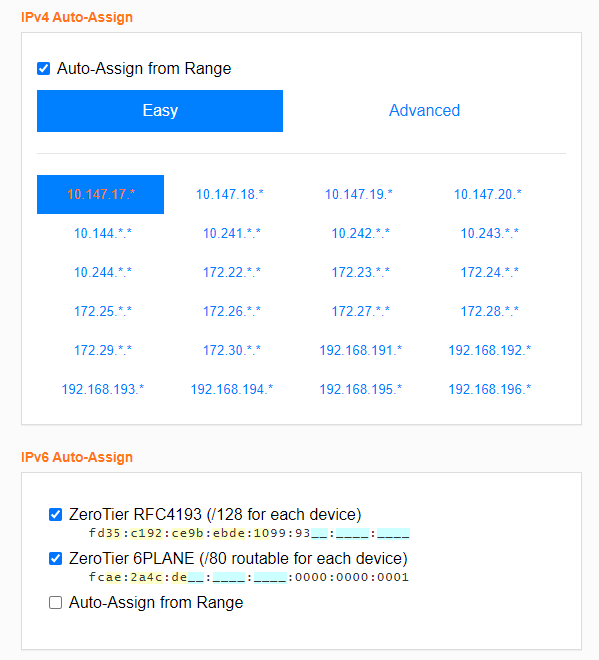
zerotier-cli set 35c192ce9bebde10 allowDefault=true随便找个顺眼得网段.
然后主机找好网段,设置转发.
ip6tables -A FORWARD -i zt7nnhseel -s 2a0c:8fc0:7612::/48 -j ACCEPT
ip6tables -A FORWARD -i eth0 -d 2a0c:8fc0:7612::/48 -j ACCEPT
记得还要打开网卡转发功能.
net.ipv4.ip_forward = 1
net.ipv6.conf.default.forwarding = 1
net.ipv6.conf.all.forwarding = 1
net.ipv6.conf.all.proxy_ndp = 1
net.ipv6.conf.all.accept_ra = 2
net.core.default_qdisc = fq
net.ipv4.tcp_congestion_control = bbr
把地址放到ZeroTier上.
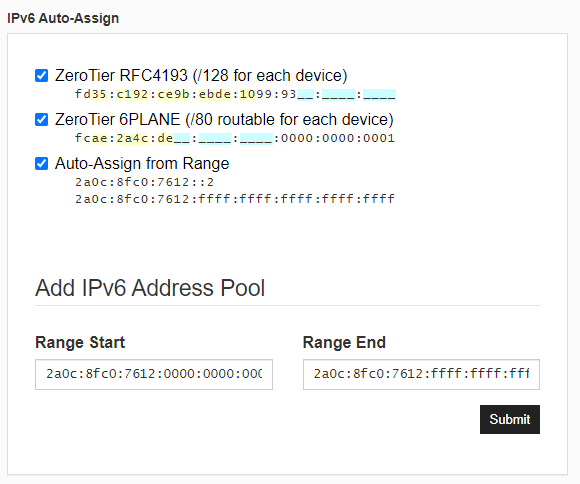
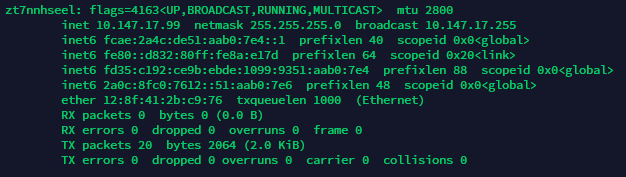
然后添加路由,使得网络全部走RFC4193分配的IP出去.
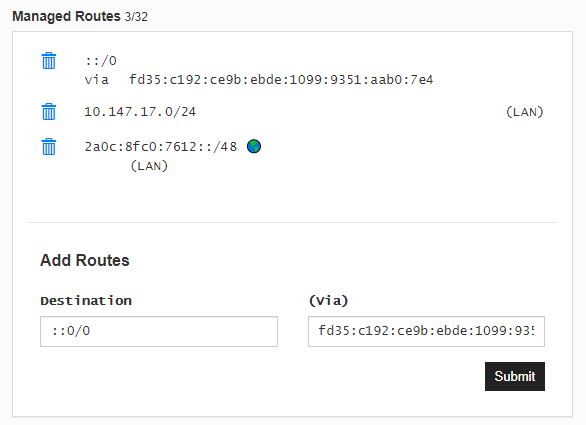
这个时候再看,IP就已经分配了.
然后在另一的机器执行加入ZeroTier网络内.
zerotier-cli join 35c192ce9bebde10
zerotier-cli set 35c192ce9bebde10 allowGlobal=true
zerotier-cli set 35c192ce9bebde10 allowDefault=true
喜欢这个风格多谢。
Windows系统的,可以介绍下吧?!
@Metal 国内效果很差,国外效果还行,直接装就可用.