上次大致把布局学了一下,还有很多控件没讲,这些都是常用的东西,只要多看看文档,基本都知道干嘛的,挨个尝试一下还是有必要的,但是就不再写了,毕竟再写就显得很冗长.
我们之前一直在MainActivity做各种试验,事实上很多软件都是活动跳转活动.
修改MainActivity的视图.
<?xml version="1.0" encoding="utf-8"?>
<LinearLayout xmlns:android="http://schemas.android.com/apk/res/android"
    android:layout_width="match_parent"
    android:layout_height="match_parent"
    android:orientation="vertical"
    android:gravity="center"
    android:padding="20dp"
    android:id="@+id/main"
    android:background="#f5f5f5">

    <!-- 登录标题 -->
    <TextView
        android:layout_width="wrap_content"
        android:layout_height="wrap_content"
        android:text="用户登录"
        android:textSize="24sp"
        android:textColor="#333"
        android:layout_marginBottom="30dp"
        android:textStyle="bold"/>

    <!-- 用户名输入框 -->
    <LinearLayout
        android:layout_width="match_parent"
        android:layout_height="wrap_content"
        android:orientation="horizontal"
        android:layout_marginBottom="15dp"
        android:layout_marginLeft="20dp"
        android:layout_marginRight="20dp"
        android:background="@drawable/edittext_bg"
        android:padding="5dp">

        <ImageView
            android:layout_width="30dp"
            android:layout_height="30dp"
            android:src="@drawable/ic_user"
            android:layout_gravity="center_vertical"/>

        <EditText
            android:id="@+id/et_username"
            android:layout_width="match_parent"
            android:layout_height="wrap_content"
            android:hint="请输入用户名"
            android:inputType="text"
            android:padding="10dp"
            android:background="@null"/>
    </LinearLayout>

    <!-- 密码输入框 -->
    <LinearLayout
        android:layout_width="match_parent"
        android:layout_height="wrap_content"
        android:orientation="horizontal"
        android:layout_marginBottom="30dp"
        android:layout_marginLeft="20dp"
        android:layout_marginRight="20dp"
        android:background="@drawable/edittext_bg"
        android:padding="5dp">

        <ImageView
            android:layout_width="30dp"
            android:layout_height="30dp"
            android:src="@drawable/ic_password"
            android:layout_gravity="center_vertical"/>

        <EditText
            android:id="@+id/et_password"
            android:layout_width="match_parent"
            android:layout_height="wrap_content"
            android:hint="请输入密码"
            android:inputType="textPassword"
            android:padding="10dp"
            android:background="@null"/>
    </LinearLayout>

    <!-- 登录按钮 -->
    <Button
        android:id="@+id/btn_login"
        android:layout_width="wrap_content"
        android:layout_height="50dp"
        android:text="登录"
        android:textColor="#fff"
        android:background="#4285f4"
        android:textSize="18sp"/>

</LinearLayout>
最原始的跳转方法,就是直接跳转,可选携带信息.
    @Override
    public void onClick(View view) {
        if(view.getId() == R.id.btn_login){
            Intent intent = new Intent(this, UserMain.class);
            Bundle bundle = new Bundle();
            bundle.putString("username",findViewById(R.id.et_username).toString());
            bundle.putString("password",findViewById(R.id.et_password).toString());
            intent.putExtras(bundle);
            startActivity(intent);
        }
    }
到了目的活动,如果要取出数据,也要取出Bundle再看信息,要注意一个坑,在onCreate验证的话,要延迟一会显示Toast才能有效,不然的话活动没创建完成,他也显示不出来.
    @Override
    protected void onCreate(Bundle savedInstanceState) {
        super.onCreate(savedInstanceState);
        EdgeToEdge.enable(this);
        setContentView(R.layout.activity_user_main);
        ViewCompat.setOnApplyWindowInsetsListener(findViewById(R.id.userMain), (v, insets) -> {
            Insets systemBars = insets.getInsets(WindowInsetsCompat.Type.systemBars());
            v.setPadding(systemBars.left, systemBars.top, systemBars.right, systemBars.bottom);
            return insets;
        });

        Bundle bundle = getIntent().getExtras();
        String username = bundle.getString("username");
        String password = bundle.getString("password");
        if (password.equals(username)) {
            new Handler(Looper.getMainLooper()).postDelayed(() -> {
                Toast.makeText(this, "验证OK!", Toast.LENGTH_SHORT).show();
            }, 300); // 延迟300毫秒再显示.
        }
    }
如果要返回信息给原始调用的活动,则要不同的方法.先在MainActivity的OnCreate注册好监听.
        // 要处理善后工作的一个Launcher,所以开始时候要注册他,如果不需要处理善后工作,不用这个调用.
        activityResultLauncher = registerForActivityResult(new ActivityResultContracts.StartActivityForResult(),result -> {
           if(result.getResultCode() == RESULT_OK && result.getData() != null){
               // 这里取出真实数据,也可以写成独立函数
           }
        });
然后替换startActivity为activityResultLauncher.launch就可以了.
activityResultLauncher.launch(intent);在第二个活动里,我做了一个输入界面,可以把内容返回第一个应用.
界面代码是这样的.
<?xml version="1.0" encoding="utf-8"?>
<LinearLayout xmlns:android="http://schemas.android.com/apk/res/android"
    xmlns:tools="http://schemas.android.com/tools"
    android:layout_width="match_parent"
    android:layout_height="match_parent"
    android:orientation="vertical"
    android:padding="16dp"
    android:id="@+id/userMain"
    tools:context=".MainActivity">

    <!-- 大输入框 -->
    <EditText
        android:id="@+id/inputEditText"
        android:layout_width="match_parent"
        android:layout_height="0dp"
        android:layout_weight="1"
        android:gravity="top|start"
        android:hint="请输入内容..."
        android:inputType="textMultiLine"
        android:minHeight="200dp"
        android:padding="8dp" />

    <!-- 按钮布局 -->
    <LinearLayout
        android:layout_width="match_parent"
        android:layout_height="wrap_content"
        android:orientation="horizontal"
        android:layout_marginTop="16dp">

        <!-- 提交按钮 -->
        <Button
            android:id="@+id/submitButton"
            android:layout_width="0dp"
            android:layout_height="wrap_content"
            android:layout_weight="1"
            android:layout_marginEnd="8dp"
            android:text="提交" />

        <!-- 清空按钮 -->
        <Button
            android:id="@+id/clearButton"
            android:layout_width="0dp"
            android:layout_height="wrap_content"
            android:layout_weight="1"
            android:layout_marginStart="8dp"
            android:text="清空" />
    </LinearLayout>
</LinearLayout>
返回用的是finish,startActivity是压入新的堆栈,不属于返回.
    @Override
    public void onClick(View view) {
        if (view.getId() == R.id.clearButton){
            inputEditText.setText("");
        }else if(view.getId() == R.id.submitButton){
            Bundle bundle = new Bundle();
            bundle.putString("msg",inputEditText.getText().toString());
            Intent intent = new Intent();
            intent.putExtras(bundle);
            setResult(AppCompatActivity.RESULT_OK,intent);
            finish();
        }
    }
在MainActivity继续完善.
        // 要处理善后工作的一个Launcher,所以开始时候要注册他,如果不需要处理善后工作,不用这个调用.
        activityResultLauncher = registerForActivityResult(new ActivityResultContracts.StartActivityForResult(),result -> {
           if(result.getResultCode() == RESULT_OK && result.getData() != null){
               // 这里取出真实数据,也可以写成独立函数
               Bundle bundle = result.getData().getExtras();
               String msg = bundle.getString("msg");
               if (!msg.isEmpty()){
                   Toast.makeText(this,msg,Toast.LENGTH_LONG).show();
               }
           }
        });
为什么用registerForActivityResult,而之前的方法为什么都废弃了,因为registerForActivityResult对于一些操作方便太多了,也统一了接口,比如下面方法实现一个选择系统图片.
@Override
protected void onCreate(Bundle savedInstanceState) {
    super.onCreate(savedInstanceState);
    setContentView(R.layout.activity_main);

    pickImageLauncher = registerForActivityResult(
        new ActivityResultContracts.StartActivityForResult(),
        result -> {
            if (result.getResultCode() == RESULT_OK && result.getData() != null) {
                Uri selectedImageUri = result.getData().getData();
                handleSelectedImage(selectedImageUri);
            }
        });
}
使用一个选择图片的意图就行.
private void pickImageFromGallery() {
Intent intent = new Intent(Intent.ACTION_PICK);
intent.setType("image/*");
pickImageLauncher.launch(intent);
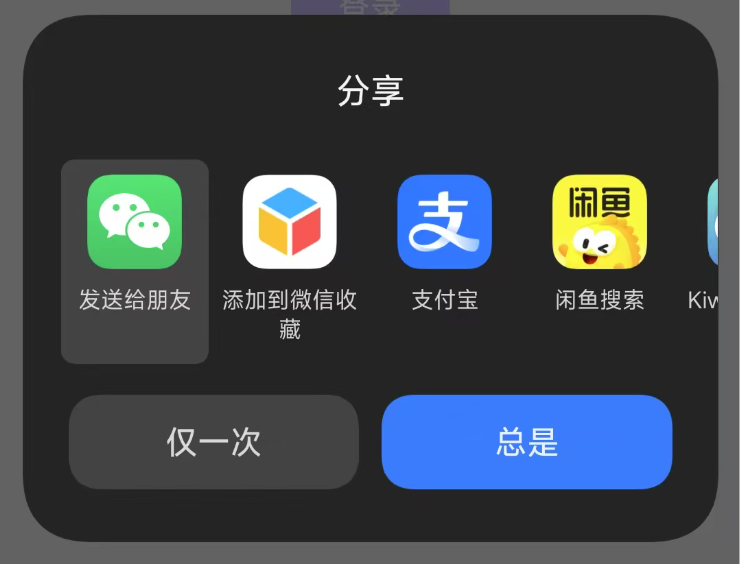
}当然安卓来回传递信息也可以不用Bundle,只是用了打包起来会更加符合最佳实践?意图也有很多用法,比如分享,打电话,发短信,听电话等.
Intent sendIntent = new Intent();
sendIntent.setAction(Intent.ACTION_SEND);
sendIntent.putExtra(Intent.EXTRA_TEXT, "这是我要分享的文本内容");
sendIntent.setType("text/plain");

if (sendIntent.resolveActivity(getPackageManager()) != null) {
    startActivity(sendIntent);
}
就会发起系统的分享功能.
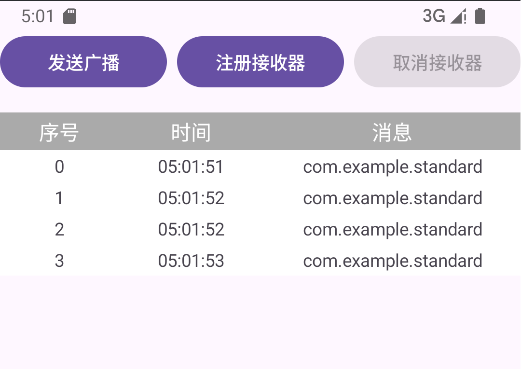
但之前的交互都是应用内交互,如果需要用到App之间数据流转,就要用到应用广播,活动是一对一进行通信的,广播是一人广播,需要听的人都能听到,发的人不用管有没有人听.接收的人也可以只关心自己感兴趣的内容.标准广播是所有人都可以收到,并且不能中断别人接收,需要明确过滤才能接收到.
protected void onCreate(Bundle savedInstanceState){
    // 省略其他代码

    unregister_receiver.setEnabled(false);
    register_receiver.setEnabled(true);

    send_broadcast.setOnClickListener(new View.OnClickListener() {
        @Override
        public void onClick(View view) {
            // 指定广播的名称
            Intent intent = new Intent("com.example.standard");
            sendBroadcast(intent);
        }
    });

    register_receiver.setOnClickListener(new View.OnClickListener() {
        @Override
        public void onClick(View view) {
            standarReceiver = new StandarReceiver();
            IntentFilter intentFilter = new IntentFilter("com.example.standard");
            // Context.RECEIVER_NOT_EXPORTED - 接收器只接收来自同一应用或具有相同用户ID的应用的广播
            // Context.RECEIVER_EXPORTED - 接收器可以接收来自任何应用的广播
            // Context.RECEIVER_VISIBLE_TO_INSTANT_APPS - 允许即时应用(instant apps)发送广播到你的接收器
            registerReceiver(standarReceiver,intentFilter,Context.RECEIVER_EXPORTED);
            unregister_receiver.setEnabled(true);
            register_receiver.setEnabled(false);
        }
    });

    unregister_receiver.setOnClickListener(new View.OnClickListener() {
        @Override
        public void onClick(View view) {
            unregisterReceiver(standarReceiver);
            unregister_receiver.setEnabled(false);
            register_receiver.setEnabled(true);
        }
    });

    addTableHeader();
}

private class StandarReceiver extends BroadcastReceiver {
    @Override
    public void onReceive(Context context, Intent intent) {
        addTableRow(intent.getAction());
    }
}
如果不注册接收器,发多少广播都没任何返回.
如果要控制广播的传递,可以用有序广播,接收器有自己的优先级,优先级高的接收器先处理,如果他决定abort,之后更低优先级的就无法接收,下面给出修改部分.
send_broadcast.setOnClickListener(new View.OnClickListener() {
    @Override
    public void onClick(View view) {
        // 指定广播的名称
        Intent intent = new Intent("com.example.standard");
        // 第二个参数是权限字符串
        sendOrderedBroadcast(intent,null);
    }
});

register_receiver.setOnClickListener(new View.OnClickListener() {
    @Override
    public void onClick(View view) {
        standarReceiver = new StandarReceiver();
        IntentFilter intentFilter = new IntentFilter("com.example.standard");
        intentFilter.setPriority(100); // 设置优先级为100,数字大的先处理
    }
});

private class StandarReceiver extends BroadcastReceiver {
    @Override
    public void onReceive(Context context, Intent intent) {
        // 如果我执行这个,其他更低优先级的人就不能接收广播了.
        abortBroadcast();
    }
}
前面两种接收器都是代码中注册,静态注册就是在AndroidMainfest.xml注册,不过目前限制比较大,一般是用于电池状态改变,系统开机完成之类的.支持的方法这里有写.
前面说到的意图,都是立马要做的,还有一种意图是延迟执行的,可以认为是延迟意图.比如定时器管理器
只需要指定发送方式就可以.
Intent intent = new Intent("com.example.standard");
PendingIntent pendingIntent = PendingIntent.getBroadcast(MainActivity.this,0,intent,PendingIntent.FLAG_IMMUTABLE | PendingIntent.FLAG_UPDATE_CURRENT);
AlarmManager alarmManager = (AlarmManager) getSystemService(ALARM_SERVICE);
long delayTime = System.currentTimeMillis() + 1000;
alarmManager.setAndAllowWhileIdle(AlarmManager.RTC_WAKEUP,delayTime,pendingIntent);
Toast.makeText(MainActivity.this,"已发送广播",Toast.LENGTH_LONG).show();
AlarmManager用setAndAllowWhileIdle可以保证在空闲状态也能发送广播,虽然可以用setRepeating来发送重复广播,但是不精确,也要精确的话,还是用普通发送,接收到后再发送一次.
刚才说到的闹钟就是一种服务,我们自己也可以创建服务,服务里也可以有自己的方法,可以直接在IDE创建并重写方法.
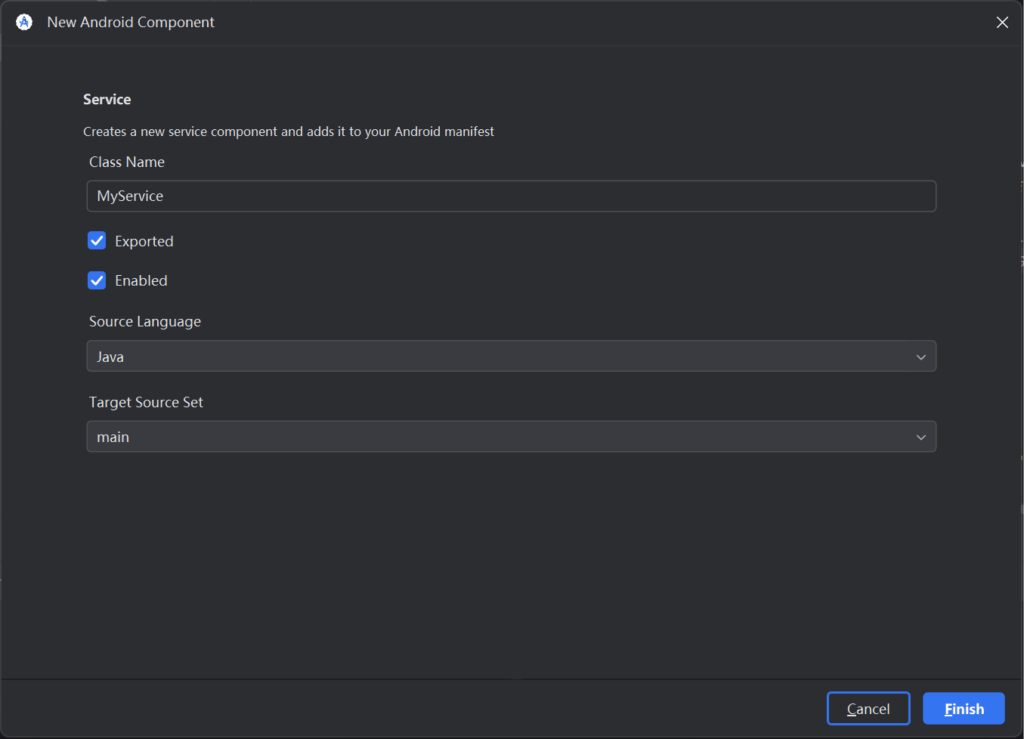
一个简单的服务例子.
public class CustomService extends Service {
    // 自定义Binder类
    public class MyBinder extends Binder {
        public CustomService getService() {
            return CustomService.this; // 返回服务实例
        }
    }

    private final IBinder binder = new MyBinder();

    @Override
    public IBinder onBind(Intent intent) {
        return binder; // 返回Binder对象
    }

    // 无参方法
    public void doTask() {
        Log.d("Service", "执行自定义任务");
    }

    // 带返回值
    public String getData() {
        return "来自服务的数据";
    }

    // 带参数
    public int calculate(int a, int b) {
        return a + b;
    }
}

public class MainActivity extends AppCompatActivity {
    private CustomService mService;
    private boolean isBound = false;

    private ServiceConnection connection = new ServiceConnection() {
        @Override
        public void onServiceConnected(ComponentName name, IBinder binder) {
            // 通过Binder获取服务实例
            CustomService.MyBinder myBinder = (CustomService.MyBinder) binder;
            mService = myBinder.getService();
            isBound = true;

            // 调用服务的自定义方法
            mService.doTask();
            String data = mService.getData();
            int result = mService.calculate(3, 5);
        }

        @Override
        public void onServiceDisconnected(ComponentName name) {
            isBound = false;
        }
    };

    @Override
    protected void onStart() {
        super.onStart();
        // 绑定服务
        Intent intent = new Intent(this, CustomService.class);
        bindService(intent, connection, Context.BIND_AUTO_CREATE);
    }

    @Override
    protected void onStop() {
        super.onStop();
        if (isBound) {
            unbindService(connection); // 解绑服务
            isBound = false;
        }
    }
}